현재 사내에서 키워드를 검색하여 관련 콘텐츠를 보여주는 앱을 구현하고 있다.
기술 기획 - 앱에 들어갈 기술 목록
- 검색 및 검색 결과 확인
- 검색 키워드 관련 콘텐츠(텍스트 콘텐츠 또는 채팅방)
- 텍스트 콘텐츠
- 음성 채팅방
- 로그인
첫번째로 텍스트 콘텐츠와 관련 UI를 구현해보자.
텍스트 콘텐츠 UI 구현
텍스트 콘텐츠 상세화면 구현
텍스트 콘텐츠 상세화면에 들어갈 요소는 제목, 출처, 작성일, MBTI 타입, 그리고 콘텐츠 내용이다.
이를 스위프트 UI로 구현하면 다음과 같다.
import SwiftUI

struct ContentDetail: View {

    var contItem: ContentDetailData

    var body: some View {
        VStack(alignment: .leading){
            Group {
								// 콘텐츠의 타이틀
                Text(contItem.title)
                    .font(.title)
                    .fontWeight(.black)
                    .padding()
                // 출처와 작성일, MBTI 타입
                HStack{
                    Text("출처:")
                    Text(contItem.source)
                }
                .font(.subheadline)
                .padding(.leading)
                HStack{
                    Text("작성일:")
                    Text(contItem.published_at)
                }
                .font(.subheadline)
                .padding(.leading)
                HStack{
                    Text("MBTI:")
                    Text(contItem.mbti.joined(separator: " "))
                }
                .font(.subheadline)
                .padding(.leading)

                Divider()
								// 콘텐츠
                Text(contItem.content)
                    .font(.body)
                    .foregroundColor(.black)
                    .frame(
                        minWidth: 300,
                        maxWidth: .infinity,
                        minHeight: 0,
                        maxHeight: 300,
                        alignment: .topLeading
                    )
                    .padding()
                Divider()
            }
        }
    }
}

struct ContentDetail_Previews: PreviewProvider {
    static var previews: some View {
        ContentDetail(
            contItem: ModelData().contentItems[0]
        ).previewLayout(.fixed(width:310, height:300))
    }
}
이 UI에서는 ContentDetailData 를 받아서 제목 및 출처 등에 사용하였다. 이는 추후 REST API 로 콘텐츠 정보를 받아 처리하기 위해 미리 REST API의 응답 형태로 struct 를 만들었다. ContentDetailData의 형태는 다음과 같다.
import Foundation
import SwiftUI

struct ContentDetailData: Hashable, Codable, Identifiable {
    var id: Int
    var title: String
    var content: String
    var source: String
    var published_at: String
    var mbti: Array<String>

    private var imageStr: String
    var image: Image {
        Image(imageStr)
    }
}
Python 에서 Dict와 유사하게 struct 를 구현하여 사용하였다.
(*이 Struct 는 콘텐츠 목록을 보여줄 때도 사용하기에 제목, 출처 외에 다른 칼럼도 포함되어 있다.)
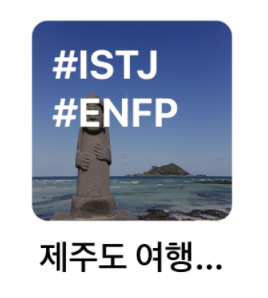
텍스트 콘텐츠 목록 내 Element 화면 구현
텍스트 콘텐츠는 키워드 검색 또는 메인 화면에서 추천 콘텐츠로 보여질 예정이다. 그래서 콘텐츠의 정보를 간략하게 담기 위한 목록내 Element 요소를 구현해야한다.
코드로 구현하면 다음과 같다.
import SwiftUI

struct ContentItem: View {
    var contentData: ContentDetailData

    var body: some View {
        VStack(alignment: .leading){
            ZStack(alignment: .leading){
                contentData.image
                    .resizable()
                    .overlay{
                        Rectangle()
                            .frame(width: 100, height: 100)
                            .opacity(0.3)
                    }
                    .frame(width:100, height: 100)
                    .clipShape(Rectangle())
                    .cornerRadius(8)
                    .overlay(alignment: .top){
                        VStack{
                            Text(contentData.mbti.joined(separator: " "))
                                .frame(width: 80, height: 50, alignment: .topLeading)
                                .foregroundColor(.white)
                                .font(.system(size: 20, weight: .bold))
                                .minimumScaleFactor(0.5)
                                .padding(.top, 10)

                        }
                    }
            }

            Text(contentData.title)
                .font(.headline)
                .bold()
                .foregroundColor(.black)
                .frame(width:100)
                .lineLimit(1)
                .padding(0)

        }.padding()
    }
}

struct ContentItem_Previews: PreviewProvider {
    static var previews: some View {
        ContentItem(
            contentData: ModelData().contentItems[0]
        )
    }
}
위 예시에서 보면 사진 위에 텍스트가 오버랩 되어 있다. 이를 구현하기 위해 ZStack을 사용하여 오버랩을 사용하였다.
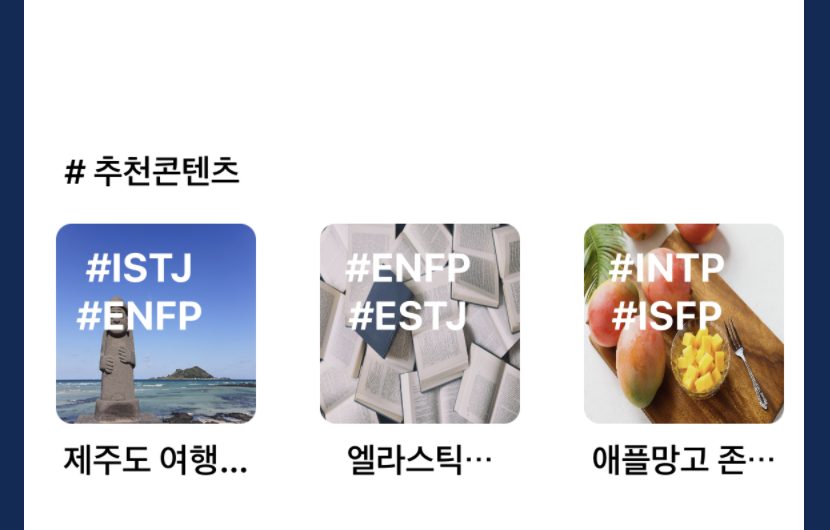
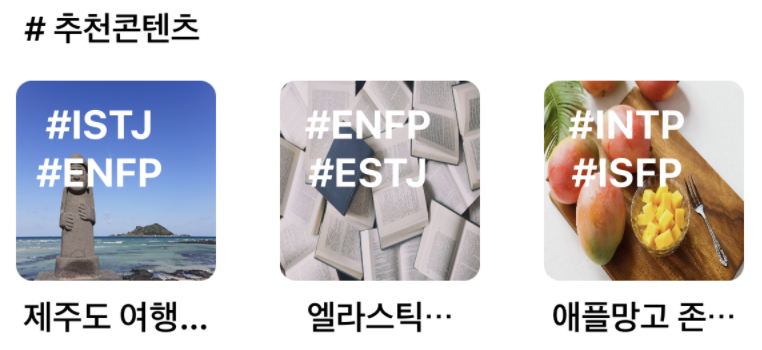
텍스트 목록 구현
현재까지 만든 콘텐츠 Element 와 상세 화면을 연결하는 목록 화면을 구현해야 한다.
이를 코드로 구현하면 다음과 같다.
import SwiftUI

struct ContentRow: View {
    var contentList: [ContentDetailData]

    var body: some View {
        VStack(alignment: .leading){
            Text("# 추천콘텐츠")
                .font(.headline)
                .bold()
                .padding(.leading, 20)
                .padding(.bottom, -8)
                .padding(.top, 10)

            ScrollView(.horizontal, showsIndicators: false){
                HStack(alignment: .top, spacing: 0){
                    ForEach(contentList) { item in
                        NavigationLink{
                            ContentDetail(contItem: item)
                        } label: {
                            ContentItem(contentData: item)
                        }
                    }
                }
            }
        }
    }
}

struct ContentRow_Previews: PreviewProvider {
    static var previews: some View {
        ContentRow(contentList: ModelData().contentItems)
    }
}
추천 콘텐츠에서 보여줄 콘텐츠의 목록은 몇개가 될지 모르기 때문에 ScrollView 로 구현했다. ContentDetail 또는 ContentItem에 넘기는 데이터는 위에서 설명했던 ContentDetailData 를 사용하였다.
구현 첫번째로 텍스트 콘텐츠 목록과 이를 보여줄 수 있는 라벨, 그리고 상세 페이지 까지 구현하였다.
다음에는 채팅방 UI 를 구현해보자.
'IOS(Swift)' 카테고리의 다른 글
| [IOS/Swift] MBTI 카드 선택 게임 UI 구현 (0) | 2022.05.22 |
|---|---|
| [IOS/Swift] 콘텐츠 검색 앱 구현 - 4. 로그인 UI 구현 (0) | 2022.04.04 |
| [IOS/Swift] 콘텐츠 검색 앱 구현 - 3. 회원가입 UI 구현 (0) | 2022.04.04 |
| [IOS/Swift] 콘텐츠 검색 앱 구현 - 2. 채팅방 UI 구현 (0) | 2022.03.05 |


